Let’s be blunt—water is not your bathroom’s friend. And if you’ve ever dealt with warped baseboards, squishy subflooring, or mold creeping where it shouldn’t, you already know that waterproofing isn’t optional—it’s essential. Whether you’re remodeling or starting from scratch, knowing how to waterproof bathroom flooring the right way can save you from costly repairs and structural headaches down the road.
I’ve seen beautifully designed bathrooms undermined by poor prep. So here’s a Vern Yip–approved, step-by-step guide to waterproofing your bathroom floor—stylish, smart, and urgent.
1. Start with the Right Subfloor (and Inspect It Closely)
Before you even think about tile or vinyl, check the health of your subfloor. Most bathrooms use plywood or cement board. Any signs of rot, sagging, or moisture damage? Replace it now. This is your foundation—don’t build on a ticking time bomb.
👉 Vern’s Tip: Use cement board (like HardieBacker) in wet zones. It resists mold, won’t warp, and creates a sturdy base for your waterproofing layers.
Explore our Bathroom Remodel solutions to start from the subfloor up.
2. Seal Every Seam Like It Matters—Because It Does
Anywhere two surfaces meet—walls, floor transitions, or board joints—seal it with waterproof mesh tape and a waterproofing membrane (more on that next).
✅ Use:
Mesh seam tape rated for wet areas
Thin-set mortar or waterproof adhesive
Caulk around edges once finished
This step keeps water from sneaking in behind the scenes—and causing slow, hidden damage.
3. Apply a Liquid Waterproofing Membrane
Think of this as your invisible armor. Roll or brush on a liquid waterproofing membrane like RedGard or AquaDefense over the entire floor and a few inches up each wall.
🛡 Must-Have Qualities:
Mold and mildew resistant
Flexible when dry (so it won’t crack with movement)
Compatible with tile, stone, or vinyl flooring
👉 Why It’s Urgent: One missed coat could mean moisture seeps into the subfloor—and stays there for months before you notice.
Need professional guidance? Our Bathroom Remodel Companies Near Me: How to Find the Best Bathroom Remodelers article can point you in the right direction.
Check Our Recent Projects
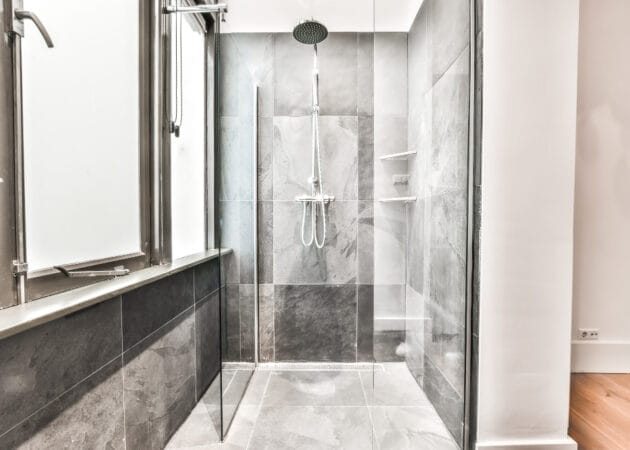
4. Waterproof the Shower Threshold & Drain Area
This is where most water damage starts. Pay special attention to:
Shower pans—use pre-sloped or custom-built liners
Floor drains—ensure sealant around the flange
Transitions between wet/dry areas—install barriers or raised edges to redirect water
🚿 Pro Move: Use a bonded flange drain system to integrate directly with your membrane layer.
Check out our Elegant Bathroom Remodel in Grass Valley, CA to see how we handle high-risk moisture zones.
5. Choose Flooring That Does the Work
Yes, tile is beautiful. But not all tile is created equal.
Top Waterproof Choices for Bathroom Flooring:
Porcelain tile: Denser and more water-resistant than ceramic
Luxury Vinyl Plank (LVP): 100% waterproof and incredibly stylish
Natural stone with proper sealant: Timeless, but requires ongoing care
👉 Vern’s Style Note: Sleek, large-format tiles minimize grout lines (a.k.a. fewer places for water to sneak in).
For a durable, elegant option, explore Luxury Vinyl Tile: The Affordable Flooring Solution.
6. Seal the Grout—Yes, Even If It’s New
After installation, apply a grout sealer. This crucial step prevents water from absorbing into the grout—especially in showers or near sinks.
🧽 Reapply every 1–2 years to maintain the seal, especially in high-traffic bathrooms or homes with humidity-prone climates.
7. Finish Strong: Caulk, Baseboards, and Transitions
Use 100% silicone caulk at all change-of-plane areas (floor-to-wall, tile-to-tub, etc.). Then install moisture-resistant baseboards—PVC, tile, or sealed wood—and seal the bottom edge with caulk to prevent water from pooling underneath.
🚫 Avoid:
MDF baseboards (they swell like a sponge)
Leaving gaps at flooring transitions (use reducers or threshold strips)
Looking for durable options? Our Tile Flooring services provide both form and function that last.
✅ Call to Action:
Waterproofing isn’t glamorous, but it’s what protects all the beautiful work you do see. If you’re starting a remodel, don’t wait until the damage is done. Our expert team can help you install or upgrade waterproof bathroom flooring with pro-level precision and timeless design. Contact us today—before the leak happens.
