Key Takeaway
To plan a kitchen remodel, start by documenting what frustrates you, set your scope (refresh, same-footprint remodel, or full layout change), and lock appliance model numbers before approving cabinet drawings. Build your budget by category with a 10-20% contingency, confirm permits, and order long-lead materials before demolition begins. Decision order drives success: every step skipped up front becomes a costly correction later.
Start by identifying what is not working in your current kitchen, ranking your must haves against your nice-to-haves, and deciding whether you need a cosmetic refresh, a same-footprint remodel, or a layout change. From there, lock the layout and appliance specifications, confirm permits and a written scope, and order long-lead materials before anyone swings a hammer. Careful planning up front is what keeps a kitchen remodel from turning into a series of expensive corrections.
This blog post is for the homeowner planning a kitchen renovation who wants a roadmap, not another gallery of pretty cabinets. One idea organizes everything below: plan the decisions before you plan the demolition. Decision order and construction order are not the same thing, and confusing them is where most projects go sideways. Scope matters too, so know which tier you are in: a refresh, cabinet refacing or a same-footprint remodel, a full kitchen remodel, or a layout reconfiguration that reshapes the entire space.
How to Plan a Kitchen Remodel, Step by Step
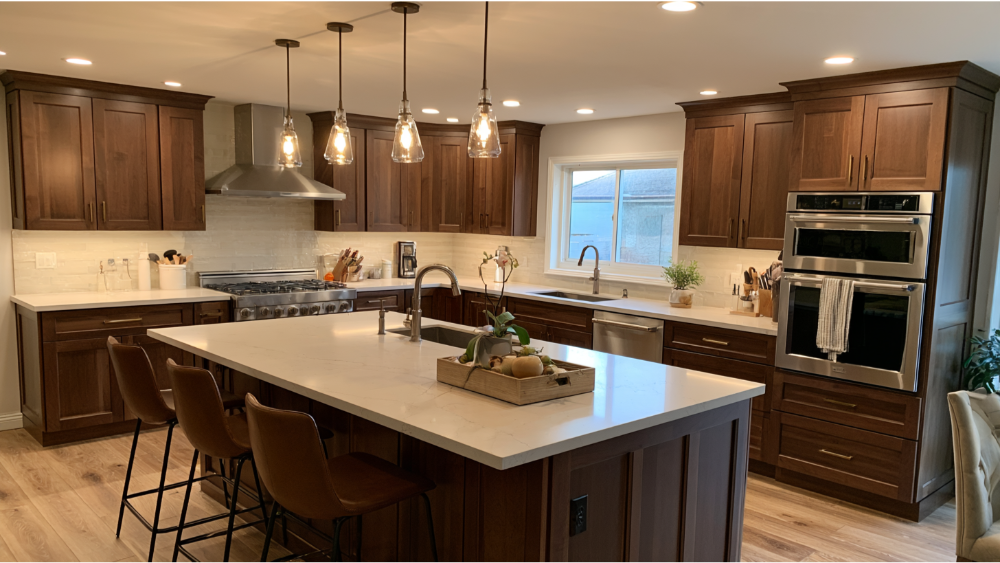
Here is the full kitchen design process, in the order the decisions actually need to happen when you are planning a kitchen remodel.
- Write down how your household uses the kitchen and what currently frustrates you.
- Set the scope: refresh, refacing, same-footprint remodel, full remodel, or layout change.
- Build a budget by category and add a contingency.
- Measure and document every existing condition, including utilities and panel capacity.
- Finalize the layout, work zones, and clearances.
- Select appliances with exact model numbers.
- Approve cabinet drawings, then choose countertop and flooring materials.
- Plan lighting locations and finishes before electrical rough-in.
- Confirm permits and sign a detailed written contract.
- Complete pre-demolition readiness, then build, inspect, and close out.
Every step below expands one of these in more detail. Skipping ahead is how change orders are born. A dream kitchen is not the product of one brilliant idea. It is the result of ordinary decisions made in the right order.
Start With How Your Family Actually Uses the Kitchen
Kitchens should be designed around what’s truly important: family, food and life. That sounds soft until you try to cook Thanksgiving dinner in a space where two people can’t pass each other. The perfect kitchen is simply the one that fits your daily life, not the one that photographs best.
Before you look at a single cabinet finish, answer these:
- Who cooks, and how often? One cook or two working at the same time?
- Where do groceries come in from, and where do they land?
- Which appliances do you use daily versus twice a year?
- Do you need a dedicated baking, coffee, or entertaining zone, or a breakfast nook where the family eats on weekday mornings?
- Where do kids do homework or guests gather while you’re cooking?
- Does anyone in the household have mobility needs now, or will they in ten years?
- How does traffic flow between the kitchen and the dining room, garage, and backyard?
Then think about storage space based on what you actually own, not a generic idea of “more storage.” Count your sheet pans. Measure your stand mixer. Busy kitchens work when cooking, cleanup, and prep each have dedicated zones with the right things stored within arm’s reach. Write all of this on one page, pain points on the left and must haves on the right. That page is your project brief, and it will settle more arguments than any inspiration photo. The key elements are specific: how many cooks, what has to stay within reach, and what you are willing to trade away.
Is It a Refresh, a Refacing Project, or a Full Kitchen Remodel?
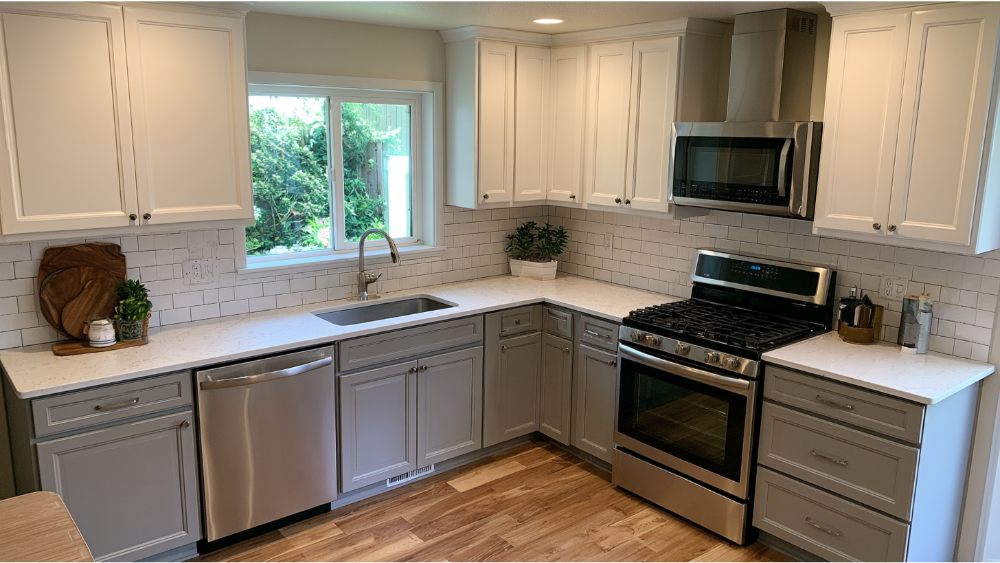
Scope, not finishes, is the single biggest driver of cost and schedule. Get honest about which tier you’re in before you fall in love with a design.
| If this is your main problem | Consider this scope |
|---|---|
| The boxes are solid and the layout works, but everything looks dated | Cosmetic refresh: cabinet refacing, new countertops, hardware, lighting, paint |
| Cabinets are failing or storage space is poor, but the layout is fine | Same-footprint remodel with new cabinets and interior storage for better functionality |
| Not enough counter space or room to prep | Full kitchen remodel with a reworked layout |
| The kitchen feels closed off from where everyone actually is | Open concept reconfiguration of the entire space, likely structural |
Cabinet refacing deserves a fair hearing. If the boxes are sound and the layout serves you, refacing with new doors, drawer fronts, and countertops gives you the feel of a freshly remodeled kitchen without moving a wall. It’s a smart path, not a consolation prize. And if a full kitchen remodel feels like too much disruption at once, a phased approach (cabinets and counters now, new flooring or a structural opening later) is a legitimate plan as long as you design the whole thing up front so phase two doesn’t undo phase one.
How to Set a Kitchen Renovation Budget (and Avoid Financial Stress Mid-Project)
A budget isn’t one number. It’s an allocation you’re willing to defend when something shinier shows up on the showroom floor.
Break your figure into categories so you can see the trade-offs: cabinets, countertops, appliances, flooring, plumbing and lighting fixtures, backsplash and finishes, labor, permits. Cabinetry is typically the largest single line item in a kitchen remodel, which is why choosing the right cabinets deserves the most planning time. Then set aside a contingency of at least 10%, and closer to 20% if your home is older or the scope includes opening walls. That reserve is what keeps a hidden water-damaged subfloor or outdated wiring from becoming a crisis instead of a Tuesday.
We don’t publish price ranges, and you should be skeptical of anyone who does without seeing your house. Scope, existing conditions, cabinetry level, and your material choices control the number. A free estimate on your actual kitchen is how you get a real figure. If paying from savings isn’t the plan, flexible financing options are available, and we’ll walk you through what’s current during your consultation rather than quoting terms that change.
Measure and Document What You Already Have
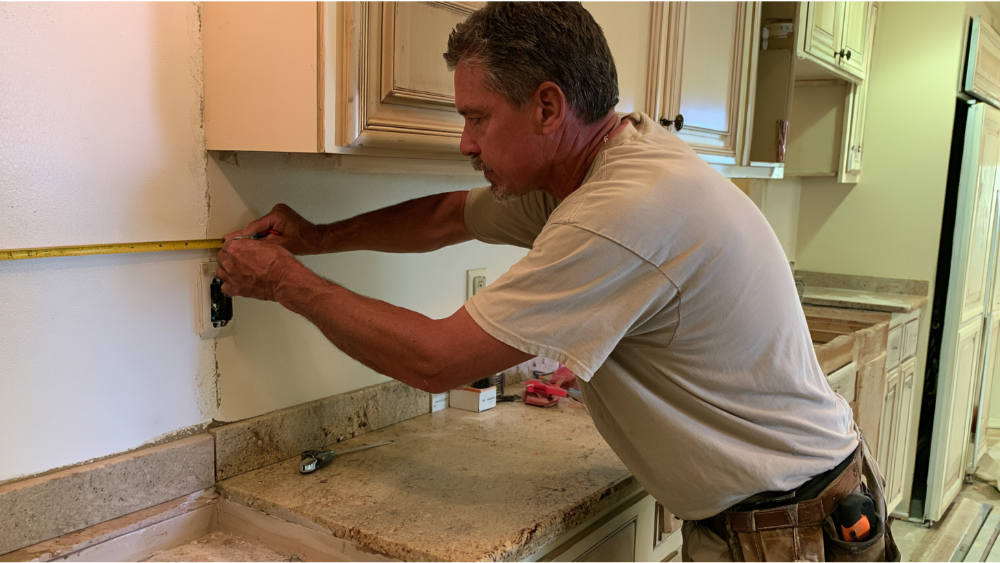
Precise measurements prevent the most expensive category of mistake: the one discovered after cabinets are already built. Document all of this before final decisions:
- Room dimensions wall to wall, plus ceiling height
- Window and door locations, sizes, and swing directions
- Wall thicknesses and any soffits or bulkheads
- Locations of plumbing supply and drain lines, gas lines, electrical runs, and existing vent ducting
- Electrical panel location and available capacity
- Existing flooring type and thickness, plus transitions to adjacent rooms
- Walls that are out of square or floors that are out of level
- Soft spots in the subfloor, especially near the dishwasher, sink, and refrigerator
- Walls that may be load bearing
- The year the home was built
Your measurements are perfect for early planning and for confirming an appliance will fit the available space. They should never replace professional field measurements for cabinet fabrication. A half-inch error becomes a filler strip at best and a re-order at worst.
Planning a Kitchen Layout With Workable Counter Space
The five basic kitchen layouts
- One-wall: everything on a single run. Efficient for apartments, condos, and small footprints where every inch of counter space counts.
- Galley: two parallel runs facing each other. Maximizes workspace in a narrow room and suits serious solo cooks.
- L-shaped: two connected runs. An L shaped kitchen is efficient, versatile, and pairs naturally with open floor plans.
- U-shaped: three connected runs. A U shaped kitchen delivers generous storage space and the most counter space per square foot, which makes it ideal when one person does most of the cooking.
- Island or peninsula: adds prep surface, seating, and a natural open concept connection to the living space for households that entertain. A peninsula can also carve out a breakfast nook without borrowing a separate room.
Clearances and work zones: recommendations versus code
The NKBA Kitchen Planning Guidelines publish dimensions worth designing around. These are industry planning recommendations, not enforceable code, and a newer edition exists, so confirm the version your designer uses.
- At least 42 inches for a one-cook work aisle, 48 inches when multiple cooks share the space
- At least 36 inches for a general walkway
- A traditional work triangle between sink, refrigerator, and range totaling no more than 26 feet, with each leg between 4 and 9 feet
- At least 36 by 24 inches of continuous primary prep surface next to the sink
Then test the plan against reality. Can the dishwasher door open while someone stands at the sink? Is there landing space beside the range and the refrigerator for a hot pan or a full grocery bag? Generous landing space is the detail that makes cooking feel calm instead of frantic. Is seating pushed out of the primary work aisle so stools aren’t in the cook’s path? Where do waste and recycling live, and are they near the prep zone? Counter space distribution matters more than total square footage, tight aisles will make even a large room feel cramped, and natural light is worth protecting even when a window complicates the cabinet run.
Carry this four-way distinction through the whole project: local code requirement, industry planning recommendation, manufacturer installation requirement, and household preference. They are not interchangeable, and knowing which is which tells you where you can bend.
Choose Appliances Before You Finalize Cabinet Drawings

This is a hard rule. Exact model numbers, not categories, drive cabinet opening sizes and panel requirements, dedicated circuits and panel load, gas versus electric service, water line locations, ventilation duct size and routing, required clearances, countertop cutouts, and door swings. Approving drawings for your cabinets before appliances are specified is how a $6,000 cabinet run ends up with a $400 filler patch.
Pick appliances that match how you cook and prioritize the ones you’ll use daily over luxury extras you’ve only seen on a showroom floor. Energy-efficient models earn their keep on utility bills over the life of the kitchen. And an unconventional specification changes the whole plan: a PITT Cooking setup with burners mounted directly into the countertop, for example, reshapes the cabinets beneath it and changes how much usable counter space you end up with.
Ventilation deserves its own decision. ENERGY STAR and EPA guidance both point to exhausting cooking contaminants directly outdoors with a vented hood, and duct routing has to be resolved before walls and ceilings close. NFPA research covering 2017 through 2021 found cooking caused an annual average of 158,400 reported home structure fires, 44% of all reported home fires. Clearances, landing surfaces, and ventilation are safety decisions.
Cabinets, Countertops, and Flooring: Choosing Materials That Last
Cabinetry. You’ll choose among stock, semi-custom, and custom cabinets. Stock is fastest and most limited. Semi-custom opens up sizes and finishes. Custom solves awkward walls and odd ceiling heights and lets interior storage be designed around what you own. Decide that storage space alongside the box, not after: drawer organizers, pull-outs, a pantry system, spice and tray dividers. Open shelving looks great in photos and works best used sparingly, near a coffee or display zone rather than above a cooktop. Shaker style cabinets remain the most common starting point because their clean lines work with nearly all cabinet finishes. Our own DreamLine Custom Cabinetry is built in our shop here in America, and it carries a limited lifetime warranty.
Countertops. Quartz is non-porous and low maintenance, which is why it dominates family kitchens. Cambria, Silestone, and Dekton each bring their own surface characteristics worth seeing in person before you commit. Granite is durable natural stone that needs periodic sealing. Marble countertops are beautiful and will patina with use, so choose them knowingly. We run our own CNC stone fabrication shop, which means templating and fabrication stay coordinated with the cabinet installation instead of being handed off to a third company with its own calendar.
Flooring. Hardwood is gorgeous but less forgiving near sinks and dishwashers. Luxury vinyl plank and laminate resist staining and fading and handle spills well. Ceramic and matte tile are durable and easy to maintain. Natural stone adds a weight and durability nothing else matches. We feature RIVA Spain and Cortona Maxx among our flooring lines. One thing to settle with your installer: there is no universal rule about installing new flooring before or after the cabinets. It depends on the flooring system, the cabinet plan, and the manufacturer’s installation instructions. If your existing flooring continues into adjacent rooms, decide early whether you are matching it, transitioning to it, or replacing all of it.
Lighting Fixtures, Cabinet Hardware, and the Finishing Touches That Define Your Design Style
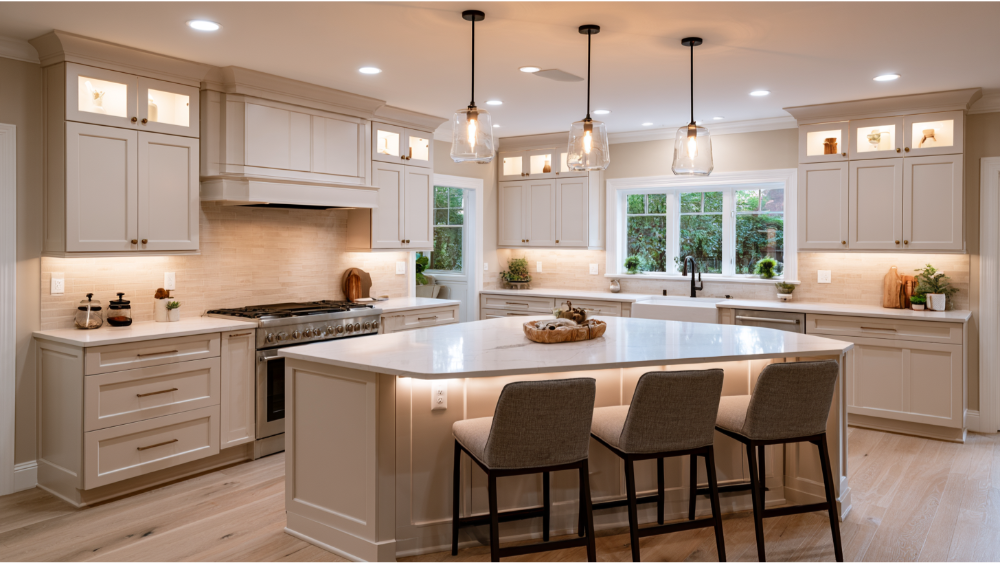
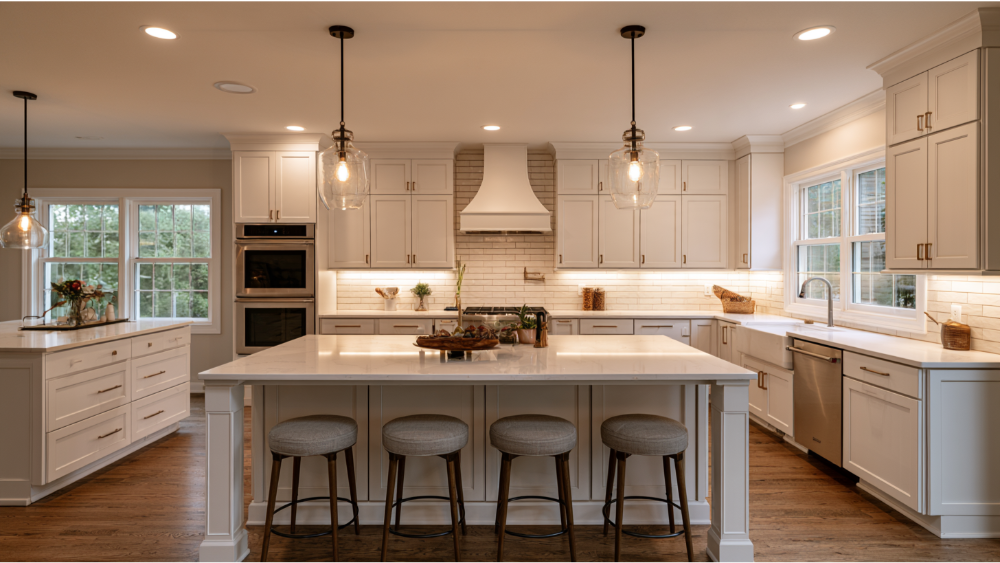
Lighting is a planning decision, not a shopping decision, because fixture locations must be set before electrical rough-in. Plan three layers: ambient light for the room, task lighting over every work surface (under-cabinet strips do more for daily usability than any other upgrade), and accent lighting inside glass-front cabinets or under toe kicks. Pendant lights over an island handle both task and style, so size and place them against the island, not the ceiling.
Design style is where personal taste takes over. Modern kitchens lean on stainless steel appliances and flat-panel cabinets. Traditional kitchens use classic raised-panel cabinetry and detailed trim. Farmhouse pairs open shelving with an apron-front sink. Transitional kitchen design blends traditional and contemporary aesthetics, which is why it tends to age gracefully. Pure contemporary aesthetics favor minimal hardware, uninterrupted runs of stone, and integrated appliance panels. Rustic leans into natural wood and stone.
Build a mood board before you buy anything
Put inspiration photos, cabinet door samples, color palettes, backsplash tile, countertop chips, and cabinet hardware in one place and look at them together under the same light. That side-by-side view is the closest you can get to previewing the finished product, and half of what you loved individually won’t survive the comparison. Our Kitchen Visualizer Tool helps you test combinations, and our 20,000-square-foot showroom in North Highlands is the fastest way to see full slabs and materials in person.
Do You Need a Permit for a Kitchen Remodel?
In most jurisdictions, yes, if you’re moving or adding plumbing, gas, or wiring, changing appliance fuel type, altering ventilation, or touching structure. New or extended electrical work almost always triggers a permit, while purely cosmetic work like painting or swapping hardware usually doesn’t. Confirm with your local building department, and never let work begin before required permits are issued. Unpermitted work has a way of surfacing at resale.
Planning a kitchen remodel in Concord and elsewhere in California
- Concord’s published residential permit matrix marks a kitchen remodel as permit-required for both new and replacement work. It also calls out GFCI protection, permits for new kitchen exhaust fans (and for replacements that move, change type, or increase rating), permits when a cooktop, oven, or range changes fuel type or increases rating, and permits for new or extended wiring, gas piping, and water piping. The matrix was revised in May 2023, so confirm specifics with the Concord Building Division.
- The 2025 California Building Standards Code (Title 24) took effect January 1, 2026. Any guide written to the 2022 cycle is now out of date.
- Concord’s published plan-review schedule estimates about 10 business days for first review and 5 for subsequent review on a residential alteration, plus roughly 2 business days for application processing. Treat that as a planning reference and verify, since turnaround moves with staffing and workload.
- Under the 2025 Energy Code, a replaced or altered kitchen exhaust fan may need to meet the previously permitted airflow or 100 CFM, whichever is greater, depending on the home’s permit history. Confirm applicability with your designer.
- For homes built before 1978, the EPA Renovation, Repair and Painting Rule applies to paid work disturbing painted surfaces. The minor-work exception is generally capped at 6 square feet of interior paint per room and 20 square feet exterior, and demolition and window replacement are covered regardless of size. We are an EPA Lead-Safe Certified Firm.
How to Choose a Design Team You Can Hold Accountable

Before you fall for a portfolio, verify the fundamentals. Interview more than one company and compare detailed written proposals, not verbal ballparks.
- Confirm the license is active and matches the business name directly through the state licensing board. In California, check at CSLB. CSLB says a license is required when a permit is involved, employee labor is used, or the job runs $1,000 or more in combined labor and materials, and that a kitchen remodel combining plumbing, electrical, and carpentry under one contract suits a “B” General Building classification.
- Confirm the classification matches the work.
- Confirm workers’ compensation coverage. California requires it for any employer with even one employee. Ask for proof of commercial general liability as well.
- Review recent comparable projects, not just the best photo in the book.
- Ask who is actually on the design team, and then ask directly: who designs, who pulls permits, who manufactures and installs the cabinets, who templates and fabricates the counters, who schedules inspections, and who comes back for punch-list items?
That last question is where many homeowners discover mid-project that “we handle everything” meant five separate companies with five separate schedules. We’ve been family-owned since 2001 and have served 19,000+ homeowners by doing the work in-house, under one roof, as a design-build firm. We hold CSLB License #853669 (B, C17, C36, C10, C-61/D41, C15, C54, D06), we’re EPA Lead-Safe Certified and A+ BBB Accredited, and we back our remodels with a 24-month labor warranty. We’ll never send you searching for another contractor to finish what we’ve started.
Put the Whole Scope in Writing Before Anyone Picks Up a Hammer
A detailed contract is how you compare bids accurately and how you settle disagreements without a lawyer. It should include:
- A detailed description of products, materials, and model numbers
- Drawings and specifications
- Work included and explicitly excluded
- Who pulls the permits
- A payment schedule tied to completed work
- Start and completion information
- Cleanup and debris removal
- How the occupied part of your home will be protected
- The written change-order process
- Warranty terms
- Final inspection and closeout
California adds specifics worth knowing. CSLB requires home-improvement terms to be in a written contract above $500. The standard down payment cannot exceed $1,000 or 10% of the contract price, whichever is less. Progress payments shouldn’t exceed the value of work completed or materials delivered. Any change to scope, materials, cost, or schedule should be a written change order signed before that work begins. Nationally the lesson is the same: one contract, one point of accountability.
Before Demolition: Your Readiness Checklist

Run this list before demo day. Every item left open becomes a delay later.
- Design approved and signed
- Appliances specified with exact model numbers
- Drawings for the cabinets approved from professional field measurements
- Permits issued
- Long-lead materials ordered with availability confirmed
- Temporary kitchen set up
- Dust-control plan agreed
- Pets, kids, and jobsite access addressed
- Water, gas, and electrical shutoffs located
- A staging area arranged for material deliveries
- Construction calendar and communication method confirmed
Red flags that mean you’re not ready: unresolved layout questions, undecided appliances, or a scope that exists only in conversation.
The Kitchen Remodel Construction Order, and Living Through It
Projects vary, but a typical sequence runs like this:
- Site protection and controlled demolition
- Structural changes and framing
- Plumbing, electrical, gas, HVAC, and ventilation rough-ins
- Rough inspections
- Insulation and drywall
- Paint preparation
- Flooring or cabinetry, per the approved system
- Cabinet installation
- Countertop templating (which happens after the cabinets are set) and fabrication
- Countertop installation
- Backsplash tile
- Appliances, fixtures, lighting, and final connections
- Finish carpentry and touch-ups
- Final inspections
- Punch list, documentation, and warranty handoff
Living at home during the work
Set up a temporary kitchen somewhere with water access, even if it’s a laundry sink or a bathroom down the hall. Relocate the refrigerator, add a microwave and toaster oven, and decide early whether you’re washing dishes or using disposables. Box and label the cookware and pantry items you’ll actually need, and store the rest. Agree on dust separation, a safe access route for crews, and daily work hours.
When the job closes out, keep one project file for your new kitchen: approved plans, permit and inspection records, the signed contract and every change order, product specifications, care instructions, manufacturer warranties, your labor warranty, paint colors, and any spare tile or flooring.
Frequently Asked Questions
How easy is it to remodel a kitchen?
The physical construction is manageable for an experienced team. The hard part is decision sequencing and coordination. Demo prep, painting, and installing cabinet hardware are reasonable homeowner tasks. Plumbing, gas, electrical, structural work, and anything requiring inspection belong to licensed trades.
Can ChatGPT design my kitchen?
It’s genuinely useful for brainstorming layouts, organizing a must haves list, and assembling a mood board. It cannot field-measure your room, verify a load bearing wall or panel capacity, confirm manufacturer clearances, produce permit-ready drawings, or stand behind the result. Use it to prepare for your design consultation, not to replace it.
What are the 5 basic kitchen layouts?
One-wall, galley, L shaped kitchen, U shaped kitchen, and island or peninsula, the last of which pairs especially well with open floor plans.
How do I plan a kitchen layout?
Map your work zones first, then test clearances against NKBA recommendations of 42 inches for a one-cook aisle, 48 inches for multiple cooks, and 36 inches for walkways. Confirm appliance door swings and landing space, then draw the whole space to scale before ordering anything.
How long should I spend planning a kitchen remodel?
Longer than most homeowners expect, and it is time well spent. Decision-making, cabinet drawings, material selections, and permitting usually take more calendar time than the construction itself. Every week spent planning a kitchen on paper is a week you do not spend living around a stalled jobsite.
Ready to Turn Your Dream Kitchen Into a Plan?
Bring us your one-page list. Photos of the room, rough measurements, your appliance wish list, the pain points you want solved, a few inspiration photos, and a target date for decisions. We’ll take it from there and turn your kitchen dreams into a buildable design, right down to the finishing touches.
Call (916) 701-9660, request your free estimate online, or visit our 20,000-square-foot Grand Kitchen and Bath Showroom at 7115 Watt Ave, Suite #100, North Highlands. We serve Concord and the greater Bay Area along with the Sacramento region.