Key Takeaway
A kitchen remodel checklist follows a strict decision order: define scope, set budget, lock layout and exact appliance specs, select cabinets and countertops, confirm permits, order materials, then move into construction and inspection checkpoints. Lock the layout and appliance dimensions before ordering cabinets or starting demolition. Cabinetry typically accounts for 30 to 35 percent of the total budget, and a 10 to 20 percent contingency protects against surprises hidden behind walls.
A great kitchen starts on paper, long before anyone swings a hammer. A kitchen remodel checklist works in decision order: define your goals and scope, set the budget, lock the layout and the exact kitchen appliances, select cabinets, countertops, and finishes, confirm permits and the contract, order materials, prepare the household, follow the construction and inspection checkpoints, then close out with a punch list and a warranty file. The single most important rule: lock the layout and the exact appliance specs before you order cabinets or start demolition. Almost every costly mistake in a kitchen renovation traces back to skipping that one step.
If you’re still gathering ideas and haven’t signed anything yet, this is the point in the planning process where a kitchen renovation checklist saves the most money. Below is the full sequence, including the parts most checklists leave out: contracts, permits, safety, and closeout. Last reviewed September 2026.
Decision Order vs. Construction Order: The Two Checklists You Actually Need
These two sequences are not the same, and confusing them causes most of the rework we see on a kitchen remodel.
| Checklist | What it is | Why it matters |
|---|---|---|
| Decision order | The sequence you make and lock your choices in | Each decision constrains the next. The layout sets the appliance envelope, the kitchen appliances set the cabinet dimensions, the cabinets set the countertops. |
| Construction order | The sequence crews physically build in | Work gets covered up permanently. Rough-in and inspections have to happen before drywall, and countertops can’t be templated before cabinets are set. |
Your range is chosen first and installed nearly last. Cabinets are ordered weeks or months before demolition day. Hold both sequences in your head and the whole renovation gets calmer.
Step 1: Choose the Scope of Your Kitchen Renovation
Scope, not the phrase “kitchen remodel,” determines permits, lead times, and who needs to be involved. Three tracks:
- Surface refresh or cabinet refacing. You keep the existing cabinet boxes and layout, and change door style, drawer fronts, hardware, countertops, and finishes. Fastest and most budget friendly path to a new kitchen, with the least disruption.
- Like-for-like replacement. New cabinets and finishes in the existing footprint, with plumbing and kitchen appliances staying roughly where they are.
- Full remodel. Layout changes, removing walls, relocated plumbing, new circuits, or a panel upgrade. Longest timeline and most coordination, and often the only way to get meaningfully more space out of the same footprint.
Cabinetry is the biggest single driver on most projects, which is why it sits at the center of this decision. If your layout already works and the boxes are solid, refacing is a legitimate answer. If you’re changing how your kitchen functions, custom cabinets (our DreamLine Custom Cabinetry line is built and finished in-house) give you dimensions that match your appliances exactly instead of forcing filler panels, and they are usually where a homeowner finds more storage without moving a single wall.
Step 2: Separate Must Haves From Nice to Haves in Your Current Kitchen
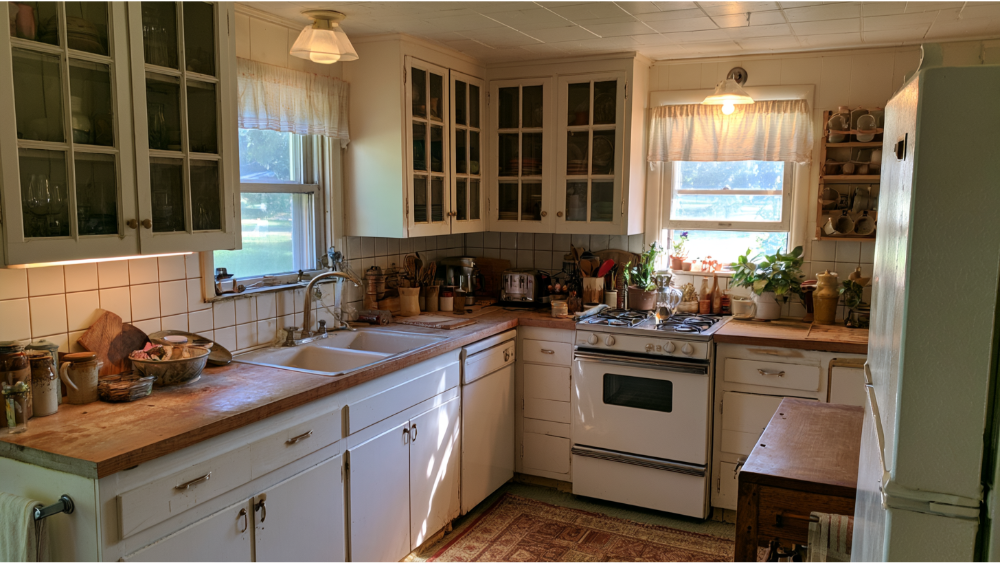
Kitchens should be designed around what’s truly important: FAMILY, FOOD and LIFE. So start with how your current kitchen fails you in daily life, not with a mood board.
- Who cooks, and how many people are in the space at once?
- What runs out first? Pantry goods, small appliances, pots, recycling?
- Where does traffic flow jam up, and who gets stuck behind an open dishwasher door?
- Are there kids, pets, mobility limits, or aging-in-place needs to plan around?
- Does the kitchen also handle homework, a laptop, device charging, or entertaining?
Now split every item into must haves and nice to haves, in writing, before you talk about money. Two regrets come up again and again: underestimating storage needs, and picking a very trendy finish that dates quickly. Function first, then style. Visual appeal is easy to add later; a layout that fights you is not. Lighting, accessibility, and energy efficiency belong on the must haves side more often than most homeowners expect, and more storage and usable counter space usually outrank the design ideas people walk in with.
Step 3: Measure and Document Your Existing Conditions
Measure before you decide anything. These notes become the existing-conditions drawing your kitchen designer builds the new plan on top of.
- Room dimensions, ceiling height, and soffit locations
- Window and door sizes, plus the delivery path for cabinets, countertops, and appliances
- Existing plumbing, gas, vent, and electrical locations
- Electrical panel capacity and available breaker space
- Floor flatness and subfloor condition
- Any moisture, past leaks, or pest damage
- The year the house was built (flag anything pre-1978 for the safety step below)
Step 4: Set a Realistic Budget and a Contingency You Don’t Touch

Every kitchen is different, so national averages won’t tell you what yours costs. What they can tell you is how budgets typically distribute. As general industry planning guidance, not a quote:
| Category | Typical share of budget |
|---|---|
| Cabinetry | 30 to 35 percent (often near half the total on cabinet-heavy projects) |
| Labor | 20 to 25 percent |
| Appliances | 15 to 20 percent |
Cabinetry carries the largest share because you’re paying for materials, box construction, hinges and glides, finish, and skilled installation in one line item.
Set aside a contingency of 10 to 20 percent and treat it as untouchable until something real surfaces behind the walls. Leaving that cushion alone is how you avoid costly mistakes mid-project, because older homes hide surprises: undersized wiring, rotted subfloor, a vent that never actually went outside. Energy Star and smart appliances deserve a line in your thinking too, since lower operating cost saves you money across the years you own the home. For your actual figures, a walkthrough and a free estimate will beat any average you find online.
Step 5: Make Design Decisions in the Right Order, From Layout to Kitchen Appliances
Work down this list and lock each item before moving to the next.
- Layout, appliance placement, and structural changes. Confirm the work triangle between sink, refrigerator, and range still functions. Removing walls to open the space is a structural question, not a styling one.
- Kitchen appliances: types, models, exact dimensions, and clearances. Pull the manufacturer spec sheets. Not the showroom tag. The spec sheet.
- Ventilation strategy and duct route. Hood width, cooking output, where the duct runs, and whether it vents outdoors.
- Sink and faucet requirements, including bowl depth, mounting style, and disposal or filtration needs.
- Cabinet layout, storage accessories, and cabinet hardware, down to soft close hinges, drawer inserts, and pull-out details. This is where you buy more storage, not just prettier doors.
- Electrical outlets, dedicated circuits, and the lighting plan. Island outlets and task lighting under the wall cabinets belong here.
- Countertops: countertop material, edge profile, and backsplash extent. Quartz stays popular for its durability and low maintenance; granite, Cambria, Silestone, and Dekton each behave differently at seams and edges. We fabricate stone in our own shop, so the template, the CNC cut, and the install answer to the same team.
- Flooring system and finished floor height, which affects dishwasher clearance and toe kicks.
- Finishes: painted cabinets or stained wood, tile, paint colors, hardware, and decorative fixtures.
One labeling note that prevents arguments later. Dimensions come from three different sources and they are not interchangeable: code requirements set by your jurisdiction, industry design recommendations (the NKBA planning guidelines, fifth edition), and manufacturer installation requirements in the appliance literature. When they conflict, code wins, and the manufacturer’s install spec protects your warranty.
Kitchen Island, Cabinet, and Countertop Dimensions to Confirm in Writing
Range and refrigerator opening widths and depths. Hood width and mounting height. Dishwasher height against the finished floor. Sink base interior width. Aisle space on every side of a kitchen island, confirmed before you fall in love with the drawing. And cabinet depth at any island seating overhang.
Step 6: Confirm Permits, Code, and Pre-Demolition Safety
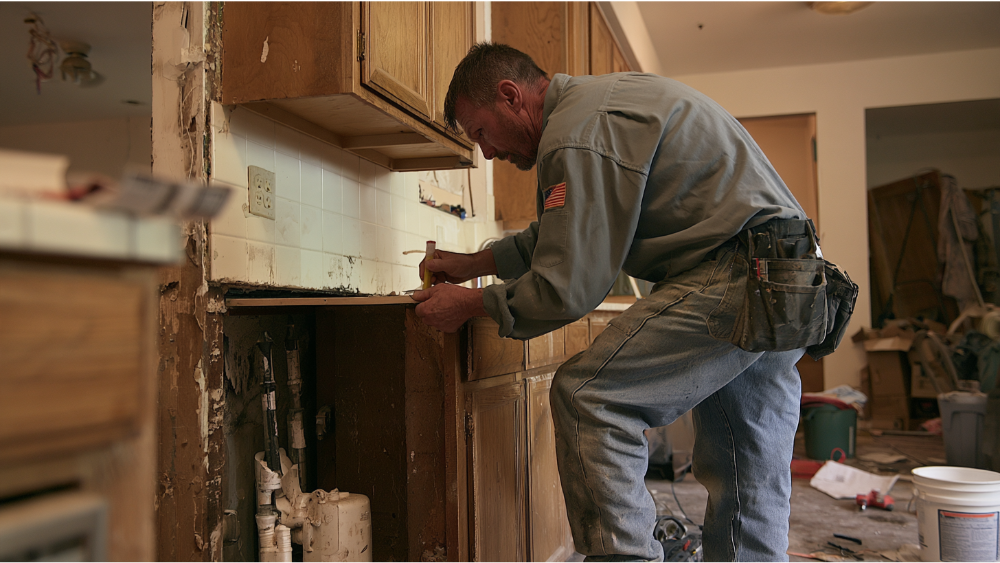
Permit triggers follow the work, not the word “remodel.” Moving walls, relocating plumbing or gas lines, adding circuits, upgrading a panel, running new ductwork, and energy-compliance items can each be separate triggers. Check with your local building department before anything is torn out, and ask your contractor to identify the inspection hold points in writing before construction starts. Demolition should begin only after permits are in hand.
Before Demolition: Lead and Asbestos
If your home was built before 1978, the EPA Renovation, Repair and Painting Rule generally applies to paid work that disturbs painted surfaces. The firm must be certified and use trained renovators and lead-safe work practices. The minor-repair exemption is generally 6 square feet or less of disturbed paint per room indoors and 20 square feet outdoors, and window replacement and demolition of painted surfaces stay covered regardless. America’s Dream HomeWorks is an EPA Lead-Safe Certified Firm.
The EPA also advises homeowners not to disturb suspected asbestos-containing materials. Old sheet flooring, adhesives, pipe insulation, and textured ceilings should be evaluated by a trained, accredited asbestos professional, not sampled by you.
California and Roseville Homeowners: Verify These Before Demolition
- Permit applications submitted on or after January 1, 2026 fall under the 2025 California Building Standards Code (Title 24), the cycle running through December 31, 2028, per DGS and the Building Standards Commission.
- Roseville generally requires a permit before a structure is altered, and the City states the homeowner remains responsible for making sure permits are obtained, even when a contractor pulls them.
- Roseville submittals are digital and may include plans, energy forms, equipment specifications, electrical load calculations, and plumbing sizing.
- An Asbestos NESHAPS Declaration of Notification Compliance is required with renovation, demolition, and remodeling projects. Placer County sits under a non-delegated air district per CARB, so confirm project-specific requirements.
- Panel upgrades need Roseville Electric approval before the building permit application: allow up to 48 hours for initial review, and give 72 hours’ notice before a disconnect.
- California kitchen faucets default to 1.8 GPM at 60 psi, with a temporary boost allowed to 2.2 GPM. A range hood used to satisfy local kitchen exhaust has historically been required to vent outdoors at a minimum of 100 CFM per California Energy Commission guidance. Verify your design under the current code cycle.
Step 7: Vet Your Kitchen Designer and Remodeler Before You Sign
Bring your remodel checklist to the first meeting. A good kitchen designer will ask about your must haves and your current kitchen frustrations before showing you a single door sample.
Questions to Ask Before You Hire
- Can I see your license and proof of insurance? California readers can check status, classifications, bond, workers’ compensation, and disclosed enforcement history through the CSLB license lookup.
- Who exactly designs, permits, orders, fabricates, and installs? How much of this is handed to someone else?
- Can I have references, and where can I read reviews on more than one platform?
- Who is my single point of contact when a question comes up mid-project?
Start these conversations early. Good remodelers book out, and the schedule you want in spring gets claimed in winter. We’ll never send you searching for another contractor to finish what we’ve started, because design, permitting, fabrication, and installation all happen in-house. We’re family-owned since 2001, we’ve served 19,000+ homeowners, we hold CSLB License #853669, and we’re an A+ BBB Accredited Business.
What Belongs in a Kitchen Remodeling Contract
Everything below belongs in written agreements, not in a text thread:
- Detailed scope, plus written exclusions
- Product brands, models, finishes, colors, and quantities
- Who obtains permits
- Start and completion language
- A payment schedule tied to work actually completed or materials supplied
- A change-order process, signed before the changed work proceeds
- Cleanup and debris removal responsibility
- All warranties in writing
California specifics (CSLB): a written home improvement contract is required when combined labor and materials exceed $500. The down payment is generally capped at $1,000 or 10 percent of the contract price, whichever is less. There is generally a three-day cancellation period, and five days may apply to covered consumers aged 65 or older. Exceptions exist, so read CSLB’s own guidance rather than a paraphrase. Our remodels carry a 24-month labor warranty, and DreamLine Custom Cabinetry carries a limited lifetime warranty.
Step 8: Finalize Material Selection, Custom Cabinets, and Long-Lead Orders Before Demolition

- Confirm every order and all expected delivery dates in writing
- Collect and file appliance specification sheets
- Make sure the sink, faucet, and cooktop are on site or fully specified before countertop templating
- Verify finished floor thickness against cabinet toe kicks and dishwasher height
- Check the delivery path, doorway widths, and turning clearances
- Inspect deliveries on arrival and photograph any damage the day it shows up
- Arrange dry, climate-appropriate storage for cabinets and flooring materials
- Agree in advance on who handles damaged or incorrect items
When custom cabinets and stone are made under the same roof as the install crew, this list gets shorter and the finger-pointing disappears.
Step 9: Prepare Your Household and Set Up a Temporary Kitchen
Pack for weeks, not days. Inventory what your family actually uses, box the rest, and label everything.
- A temporary spot for the refrigerator or a mini fridge, plus a water source and a clear surface for preparing meals
- Microwave, toaster oven, electric kettle or coffee maker, and paper goods
- Dust barriers at every opening and protection over HVAC registers
- Floor and furniture protection along the path crews will walk
- A plan for keeping kids and pets out of the work zone
- Parking and access instructions for the crew
- Secure storage for valuables and anything fragile
- A simple household communication plan: who calls whom, and when
Build a little flexibility into your expectations. Unexpected issues usually turn up, and a family that planned for them keeps the stress level low.
Step 10: Know the Construction Sequence and Your Inspection Checkpoints
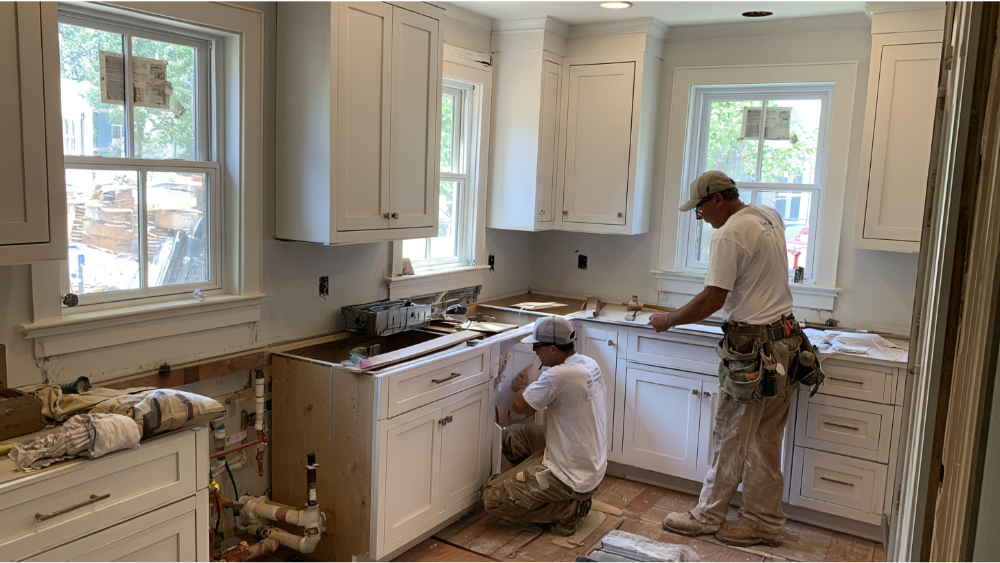
- Site protection and utility shutoffs
- Demolition
- Structural work and framing
- Plumbing rough ins, plus electrical, gas, and ventilation rough-in
- Required rough inspections
- Insulation and wall repair
- Flooring and cabinets, in the order your floor system calls for
- Cabinet installation and field verification
- Countertop templating and fabrication
- Countertops, sink, and backsplash installation
- Appliances, plumbing trim, lighting, and electrical devices
- Final inspections
Whether flooring or cabinets go first depends on the system. Tile, hardwood, floating luxury vinyl plank, and laminate each have different answers, and anyone who tells you there’s one universal rule is guessing.
On timeline, be skeptical of a single number. Your schedule has four separate parts: design and selections, permits and approvals, product procurement, and on-site construction with inspections. Planning alone commonly runs three to six months on larger projects before a crew ever arrives, and a full kitchen remodel can run a similar stretch through construction. That’s a general industry pattern, not a promise. We build your project-specific schedule after scope and selections are confirmed.
Six Checkpoints Before Work Gets Covered Up
- Before demolition: permits in hand, safety plan set
- Before cabinets are ordered: layout and kitchen appliance specs signed off
- Before drywall closes the walls: rough-in inspected and outlet locations confirmed
- Before countertop templating: sink, faucet, and cooktop on site or fully specified
- Before appliances are installed: openings measured against spec sheets
- Before final payment: punch list complete and permit closed
Step 11: The Punch List and Final Walkthrough
A punch list is the written record of every remaining item that needs attention before the job is finished. Walk the space slowly with your contractor and check:
- Cabinet doors and drawers aligned, level, and operating smoothly
- Countertops checked at every seam, plus caulk, grout lines, and edge profiles
- Faucet, drain, disposal, and dishwasher run and checked for leaks
- Every outlet, light, appliance, and the ventilation hood tested
- Paint and finish touch-ups completed
Then build your closeout file: the passed final inspection and permit closure, warranty documents, care instructions for your new kitchen surfaces, appliance manuals, paint and grout and tile records, leftover materials, shutoff locations, and before-and-after photos. Don’t release final payment until the punch list is done and the permit is closed.
Why One Accountable Design-Build Team Shortens This Kitchen Renovation Checklist

Read back through the list and you’ll notice something: most of it exists to catch handoff gaps between separate companies. The cabinet order that didn’t match the appliance spec. The countertops templated before the sink showed up. The trade that never came back. A full-service design-build team removes the handoffs, and with them most of the costly mistakes on this renovation checklist.
We handle design, permitting, material procurement, DreamLine Custom Cabinetry manufacturing, custom stone fabrication, and installation under one roof, on one contract, with one point of accountability. Family-owned since 2001, 19,000+ homeowners served across Northern California, CSLB License #853669, EPA Lead-Safe Certified, A+ BBB Accredited, and Best of Houzz for Service & Client Satisfaction in 2015, 2016, and 2017. Every remodel carries our 24-month labor warranty, and DreamLine cabinetry carries a limited lifetime warranty. We serve Roseville and the greater Sacramento area from our 20,000-square-foot Grand Kitchen and Bath Showroom in North Highlands, the largest showroom of its kind in the region.
Frequently Asked Questioins
In what order should a kitchen remodel be done? Construction runs: site protection and shutoffs, demolition, framing, rough-in for plumbing and electrical and ventilation, rough inspections, wall repair, flooring and cabinets in the order your floor system requires, countertop templating and installation, then appliances, trim, lighting, and final inspections. Your decision order is different: layout and kitchen appliances get locked first, even though the appliances are installed near the end.
What is the most expensive part of a kitchen remodel? The cabinets, typically 30 to 35 percent of the budget and closer to half on cabinet-heavy projects. You’re paying for materials, box construction, hinges and glides, finish work, and skilled installation in a single line item, which is why kitchen cabinets deserve the most planning time on your remodel checklist.
What is the 30% rule in remodeling? It’s a commonly cited budgeting rule of thumb suggesting you keep a single-room remodel within roughly 30 percent of your home’s value, and it echoes the 30 to 35 percent cabinet allocation most budgets follow. Treat it as planning guidance, not a code requirement or a rule we set.
Is $10,000 enough for a kitchen remodel? A budget at that level generally points toward a surface refresh rather than a layout change: cabinet refacing, new countertops, a new sink and faucet, flooring, paint, and lighting. Since every kitchen’s condition and scope differ, a free consultation will give you real numbers for your space instead of a national average.
Ready to Start Your Kitchen Transformation?
Bring your ideas and your kitchen remodel checklist to us. Walk the 20,000-square-foot Grand Kitchen and Bath Showroom in North Highlands and put your hands on the cabinets, stone, and flooring materials you’ve been comparing in browser tabs. If you can’t picture the new kitchen yet, try our Kitchen Visualizer Tool first. Once scope and selections are confirmed, we’ll build the project-specific plan and schedule for your kitchen renovation. Flexible financing options are available, and you can see current details on our offers page.
Schedule a Free Consultation or Get My Free Estimate: call (916) 701-9660, or visit us at 900 Sunrise Avenue, Roseville, CA 95661.