Key Takeaway
The most important kitchen remodeling tips and advice start with mapping how your household actually uses the space before choosing a single finish or fixture. Lock in layout, appliances, ventilation, cabinets, countertops, and lighting in that order, since nearly every costly change order traces back to decisions made out of sequence. Build a contingency of 15% to 20% into your budget and put every detail, including model numbers and payment terms, in a written contract before demolition begins.
A kitchen is where family life actually happens, so start there. Define how your household uses the space and what it currently fails to do, then settle scope, layout, appliances, ventilation, cabinets, countertops, and lighting before you choose a single tile or paint color. Once those decisions are locked, put the scope of work, materials, permits, payment schedule, change-order process, and warranties in writing. Most remodeling regret traces back to a decision made in a hurry after demolition started.
This guide is for the homeowner who knows the kitchen needs work but isn’t sure where to begin. We’ll walk through the planning order, the kitchen design decisions that depend on each other, how to hire for accountability, what belongs in the contract, permit and safety questions, construction prep, and the final walkthrough. We’re a family-owned design-build company that has handled this work in-house since 2001, and this is the same sequence we use to run the remodeling process on a real kitchen renovation.
What Is the First Thing You Should Do When Remodeling a Kitchen?

Before you look at a single photo, map an ordinary Tuesday. Walk through breakfast, unloading groceries, homework at the counter, cooking dinner, and cleanup, and write down every spot where the room fights you. That list is your design brief, and it’s more valuable than any inspiration board.
- Who cooks, and how many people cook at the same time?
- Where does stuff pile up because it has no home, and how much counter space does it eat?
- What’s hard to reach, hard to clean, or hard to open all the way?
- Where does household traffic collide with someone working at the sink or the range?
- Do you need to plan around kids, pets, or mobility changes down the road?
Every good kitchen decision starts with functionality. Finishes and style come later, and they come easier once you know how the space has to work.
Do You Need a Refresh, Cabinet Refacing, or a Full Kitchen Remodel?
Not every dated kitchen needs full demolition, and you don’t always have to gut the entire kitchen to fix what bothers you. Scope falls into three tiers, and the rest of this guide references them.
- Cosmetic refresh. Paint, hardware, light fixtures, faucet, backsplash. Right when the layout works and storage is adequate, but the room looks tired.
- Cabinet refacing. New doors, drawer fronts, and finish over sound existing boxes. A strong choice when the layout and storage capacity still serve you and the boxes are structurally solid.
- Full remodel. Layout changes, moving plumbing or electrical, new cabinets and countertops, new flooring, new lighting, or structural work. The right call when the room’s shape is the problem.
| Scope tier | What’s typically included | Choose it when | Effect on your household |
|---|---|---|---|
| Cosmetic refresh | Paint, hardware, light fixtures, faucet, backsplash | The layout works and storage is adequate, but the room looks tired | Least invasive of the three, with the kitchen largely usable throughout |
| Cabinet refacing | New doors, drawer fronts, and finish over sound existing boxes | The layout and storage capacity still serve you and the boxes are structurally solid | Puts your kitchen back in service faster than renovating down to the studs |
| Full remodel | Layout changes, moved plumbing or electrical, new cabinets and countertops, new flooring, new lighting, possible structural work | The room’s shape is the problem, not just its finishes | Demolition, rough-ins, and inspections mean a temporary kitchen and a firm written timeline |
Durable cabinets and countertops matter most in the second two tiers, because you’re living with those surfaces for decades. Refacing also puts your kitchen back in service faster than renovating down to the studs. If you’re weighing that middle option, our guide on cabinet refacing versus cabinet replacement goes deeper.
How to Set a Kitchen Remodel Budget You Can Actually Live With

We don’t publish prices, because a real number depends on your room, your selections, and what’s behind your walls. What we can give you is the framework.
Make three lists: must fix, must have, and nice to have. Then make a fourth, the what stays list: layout, flooring, appliances, windows and doors, plumbing locations, cabinets you’re keeping. Anything on that list is money you don’t spend. Write the lists down and stick to them, because when tradeoffs come up later they’ll make the decision for you instead of forcing an emotional call at the worst moment.
Build in a contingency of roughly 15% to 20% of the renovation budget for what gets discovered once walls open. Comparing several quotes is smart, but comparison only works when each proposal covers identical scope with named products and model numbers. Otherwise you’re comparing guesses. Flexible financing options are available, and the details live on our offers page or come up in a free consultation.
How Should You Plan a Kitchen Layout Around Work Zones and Traffic?
Think in zones rather than a single triangle: food storage, prep, cooking, cleanup, a beverage or coffee station, and waste and recycling. The classic work triangle is a useful starting point for one cook, but a busy family kitchen usually needs multiple zones so two people aren’t reaching across each other. You don’t need a huge kitchen for that. You need zones placed so each one is efficient on its own.
Useful planning targets, several of which come from the National Kitchen & Bath Association as professional recommendations rather than universal code:
- Walkways of at least 36 inches, wider where traffic passes through.
- At least 42 inches of clearance around an island, more if two people work there.
- At least 15 inches of counter space beside a cooktop for landing hot pans.
- At least 15 inches of landing space on the handle side of the refrigerator, or a counter no more than 48 inches across from the refrigerator front.
Test those clearances with everything open. Appliance doors, deep drawers, a pulled-out stool, and a person standing at full extension all take space that a flat floor plan hides. See our guide on kitchen layouts and clearance guidelines for more.
Does Your Kitchen Need a Kitchen Island?
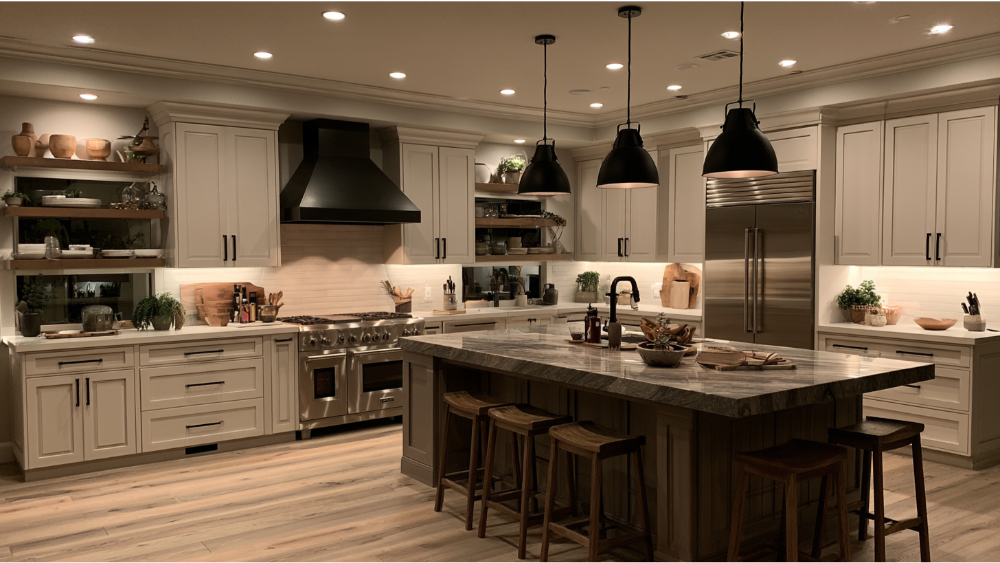
An island is the most requested feature in a modern kitchen, and also the easiest one to force into a space that can’t hold it. A kitchen island earns its place when it adds counter space, storage, and seating without choking the aisles around it, so run the 42-inch check on every side before you commit. If the walkways don’t survive, a peninsula or a deeper run of base cabinets can deliver the same prep surface. Two counter heights let one person prep while another eats. And if you want a prep sink, a cooktop, or a second oven out there, the electrical and plumbing rough-ins have to be planned under the floor long before finishes are chosen.
Why You Should Choose Appliances Before Finalizing Kitchen Cabinets
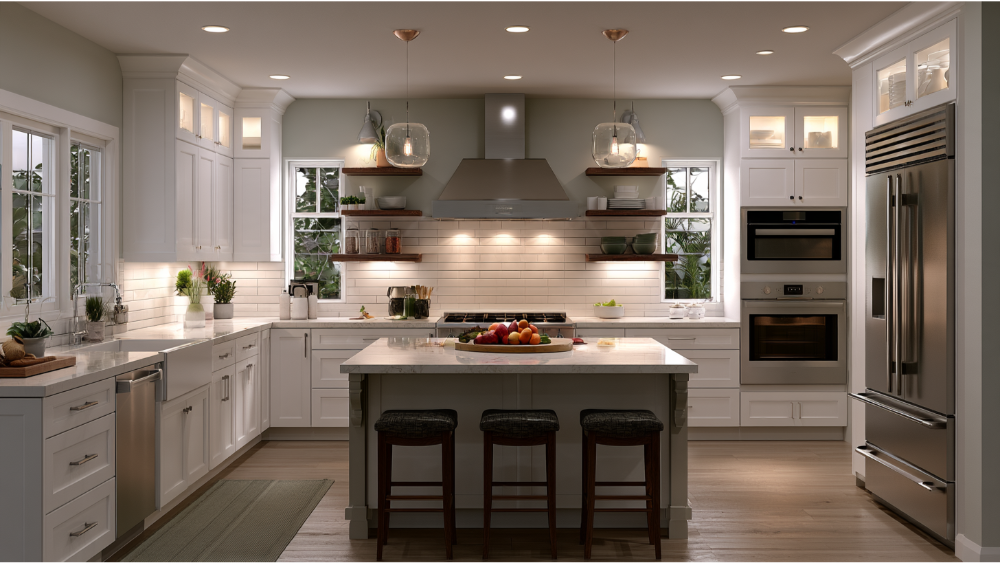
Advertised width is not installed width. Door and drawer travel, handle projection, hinge swing, required side and rear and top clearances, panel-ready trim kits, and service access all change the opening a cabinet has to provide. Pick the actual models first, get the spec sheets, and design the cabinets around them. A counter-depth fridge and a standard-depth fridge can sit several inches apart once the doors swing, and a wall oven that fits on paper may still need a deeper box than your cabinet run allows. High end appliances in particular often call for wider clearances, deeper boxes, or dedicated circuits that a standard model never asks for. The same goes for the stove, since slide-in and freestanding models meet the counter differently and change how the cabinet run finishes.
| Appliance decision | What it locks in |
|---|---|
| Refrigerator | Opening width and depth, landing space, hinge and wall conflicts |
| Range or cooktop | Gas or electrical rough-in, hood width and capture area |
| Wall oven | Cabinet height and dedicated circuit |
| Microwave | Over-the-range, drawer, or countertop, and the counter space you keep |
| Dishwasher | Plumbing location and the cabinet run beside the sink |
| Island appliances | Electrical and plumbing rough-ins under the floor |
Plan outlets, dedicated circuits, and island power while walls are still open. Adding a receptacle after drywall is closed is the kind of small change that costs far more than it should.
Kitchen Ventilation: Solve the Hood Before You Design Around It
A range hood is a building system, not a style pick. Capture works best close to the cooking surface, so hood width, mounting height, duct route, and outdoor termination need to be settled before upper cabinets and ceiling details are drawn. California Energy Commission guidance calls for at least 100 cfm exhausted outdoors when a vented hood is used to meet local kitchen exhaust requirements, generally at no more than 3 sones at that qualifying minimum setting, with exceptions at higher airflow settings. Ducting should be smooth metal, sized to the hood outlet, and run with as few restrictive bends as practical. A replacement hood reusing an existing duct may not carry the same verification obligations as an entirely new duct system, so confirm your specifics at permit review. More detail in our range hood and ventilation planning guide.
Design Kitchen Storage Around What You Actually Own
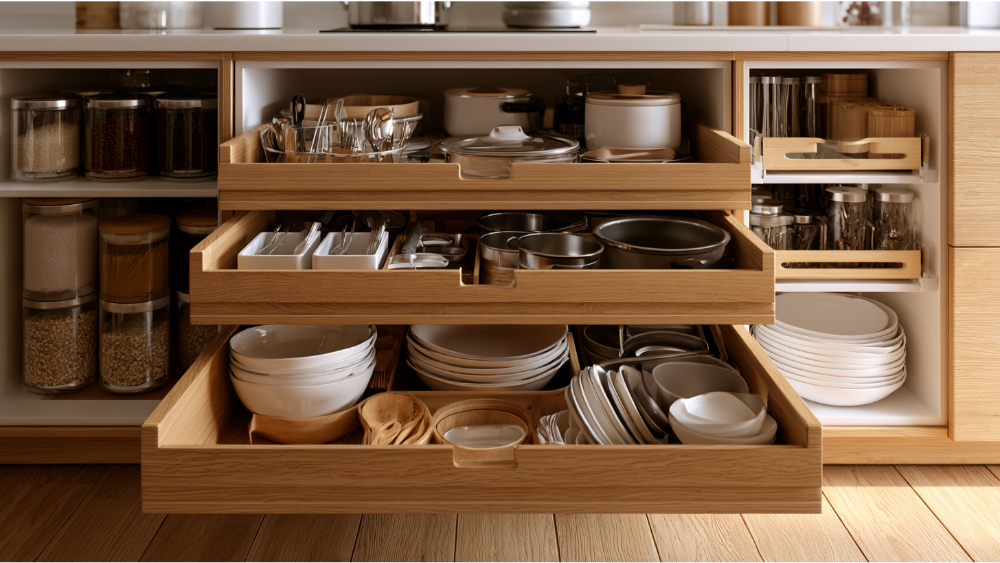
Inventory before you design. Count dishes, bowls, and the various utensils that live in your drawers. Measure sheet pans, cutting boards, trays, the stand mixer, and the air fryer. Sort pantry goods into categories. Then design cabinets to hold those specific things instead of lining the walls with generic boxes.
- Deep drawers for pots, pans, and dishes beat reaching into a dark lower cabinet.
- Corner solutions and pull-out waste and recycling bins recover space you’re currently losing.
- Vertical storage to the ceiling works for seasonal items, with a planned home for the step stool.
- A charging and paperwork drop zone keeps the counter clear.
- Everyday items belong between hip and shoulder height for easy access, which pays off as you age in place.
Where Small Appliances Live and How to Protect Counter Space
Small appliances are the quiet enemy of a clean counter. Decide early which ones earn a permanent spot and which get put away. An appliance garage with an outlet inside, a deep drawer sized for the stand mixer, or a microwave drawer in the island all buy back counter space you would otherwise surrender. If the toaster and the blender are going to sit out anyway, give them a defined zone near an outlet instead of letting them wander across the kitchen.
When stock sizes won’t fit your list, our DreamLine Custom Cabinetry is made in America in our own shop and carries a limited lifetime warranty.
Coordinate the Sink, Faucet, Dishwasher, and Countertop Together
These four decisions are one decision. Sink type and size sets the sink-base cabinet. The cabinet and sink together determine how your countertops are templated and cut. Faucet configuration sets hole drilling for the soap dispenser, filtered water tap, or air gap. Dishwasher placement sets plumbing and determines how dishes travel from table to rack.
How you use the sink matters as much as how it looks. A single deep bowl swallows sheet pans and roasting racks, and a divided sink helps if you hand-wash often. Farmhouse sinks change the cabinet in front of them, not just the countertops around them, so that choice has to land early. Check window and backsplash clearance for tall pull-down faucets before you order. Pot fillers and touch or voice-activated taps need their own supply and power decided before walls close. One California note: kitchen faucets sold on or after January 1, 2016 default to 1.8 gallons per minute at 60 psi, with an optional temporary boost to 2.2 gpm that returns to the default. And skip any listing that claims a kitchen faucet is WaterSense certified. Kitchen faucets aren’t currently an eligible WaterSense category, so look for a stated flow rate of 1.8 gpm or less instead.
Build a Layered Kitchen Lighting Plan (Ambient, Task, and Accent)
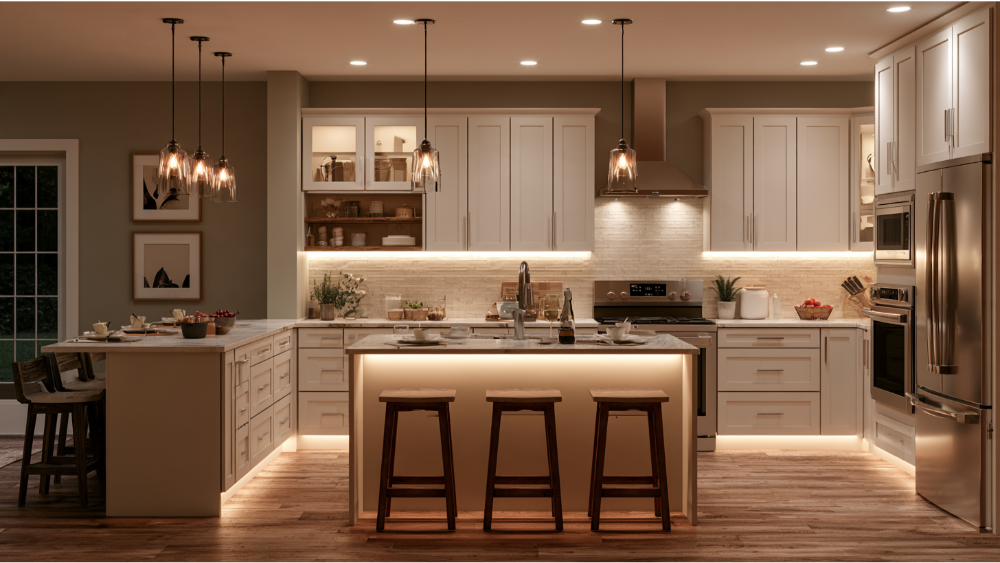
Organize kitchen lighting by the job it does, not by the fixture catalog. You want general room light, task light on every work surface, dedicated light at the sink and cooktop, pendants or a fixture over the kitchen island or table, undercabinet light, and something low and dim for a midnight glass of water. Accent light in a glass cabinet or a dark corner does the rest. Group all of it into switching and dimming zones so the room can be bright at 7 a.m. and soft at 9 p.m. Pendants are a style decision and a sightline decision at once, so hang them where they light the work surface without blocking the view across the space.
Under the 2025 California Energy Code, altered lighting in an existing home must meet the residential lighting provisions. Current Energy Commission guidance says general lighting in habitable rooms including kitchens generally needs readily accessible wall-mounted dimming controls, with listed exceptions. Undercabinet, undershelf, and display-cabinet lighting must be controlled separately from ceiling lighting, and lighting inside drawers or opaque cabinets has to shut off when they close.
Timing matters here: fix fixture locations after cabinet elevations are final, but before electrical rough-in.
Choosing Countertops, Backsplash, and Kitchen Floors for Real Life
Countertops take more abuse than any other surface in the house, so compare materials on maintenance, heat and moisture exposure, scratch and impact resistance, staining, repairability, and which cleaners you can use. Then look at them. Marble is beautiful and it stains and etches from lemon juice and wine, which some households accept and others hate. If you love marble but do heavy cooking, a quartz or porcelain slab with marble-style veining gives you the pattern without the upkeep. Quartz is a nonporous, stain-resistant alternative that needs no sealing. Porcelain tile is practical and easy to clean. Subway tile has outlasted a lot of trends, while a full-height slab backsplash creates the calm, continuous look behind so much modern kitchen design. If you’re already opening walls, skip peel-and-stick backsplash panels and install real tile over a proper substrate.
Careful language matters: these surfaces are heat-resistant and scratch-resistant, not heatproof or scratch-proof, and every one of them comes with manufacturer use-and-care guidance worth reading before you sign off. We fabricate countertops in quartz, Cambria, Silestone, Dekton, granite, and natural stone on our own CNC equipment, and carry RIVA Spain and Cortona Maxx flooring alongside hardwood, laminate, luxury vinyl plank, and tile.
Two practical cautions. Flooring thickness changes finished appliance and cabinet clearances, so decide it before cabinets are set. And judge stone from a full slab or a full-size display, never a four-inch sample. Our guides on quartz versus granite versus Dekton and the best kitchen flooring options break the comparisons down further.
Decide This Before That: A Kitchen Design Decision Order

Nearly every expensive change order on a renovation comes from taking these out of order. Here’s the sequence.
| Decide first | Because it locks in |
|---|---|
| Goals and scope | Budget and design direction |
| Layout and work zones | Plumbing and electrical moves |
| Appliances and hood | Cabinet openings, duct route, rough-ins |
| Sink and faucet | Cabinet and countertops templating |
| Cabinet elevations | Lighting locations and switching |
| Flooring | Final appliance and cabinet clearances |
| Finishes and cabinet hardware | Last, once everything above is fixed |
How Do You Choose a Kitchen Remodeling Contractor You Can Trust?
You’ve probably heard the horror stories, so let’s be direct. Checking reviews and a license number is the floor, not the evaluation. What actually predicts how your kitchen renovation goes is who owns each handoff. Ask these questions out loud and listen for a specific name or team, not a shrug.
- Who designs the project, and who field-verifies the measurements?
- Who pulls the permits and who closes them out?
- Who orders, receives, and stores materials?
- Who checks appliance spec sheets against cabinet openings?
- Who fabricates and installs the countertops?
- Who sequences plumbing, electrical, cabinets, flooring, and finish work?
- Who is my single point of contact?
- Who fixes damage, a shortage, or a mis-measure, and at whose cost?
- Who owns the punch list and answers the warranty call a year from now?
Most remodeling problems live in the gaps between separate trades that never talk to each other. That’s exactly why we built our company the way we did. Design, permitting, procurement, DreamLine cabinetry, stone fabrication, and installation all happen in-house, under one roof, on one contract, with one accountable team. We’ll never send you looking for another contractor to finish what we started.
Our record, stated plainly: family-owned since 2001, 19,000+ homeowners served, CSLB License #853669, EPA Lead-Safe Certified Firm, A+ BBB Accredited, a 24-month labor warranty on remodels, and a limited lifetime warranty on DreamLine Custom Cabinetry.
Put Every Detail in Writing: California Home Improvement Contract Rules

Your contract should read like a set of instructions anyone could follow. Make sure it includes:
- Scope of work, with plans and elevations attached
- Product model numbers and exact finish names
- Which items are allowances and which are final selections
- Exclusions, so nobody assumes
- Who obtains permits
- Start and completion expectations
- Payment schedule and change-order procedure
- Cleanup and protection of occupied areas
- Labor and manufacturer warranty documents
An allowance is a placeholder, and placeholders are where budgets slip. Convert them to specified selections as early as you can.
California homeowners have real protections here, per the Contractors State License Board. Home improvement work over $500 in combined labor and materials requires a written contract. The normal down payment can’t exceed $1,000 or 10% of the contract price, whichever is less. Beyond that lawful down payment, payments shouldn’t exceed the value of work or materials already provided. And any change to price or scope should be a written change order, signed before the changed work happens.
What Concord and California Homeowners Should Confirm Before Demolition
The City of Concord’s residential permit bulletin lists a kitchen remodel as permit-requiring work for both new and replacement work. Which permits you need depends on whether your scope touches structure, electrical, plumbing, mechanical, gas, or ventilation, so confirm through Concord’s Permit Center or the city’s Project Pal tool. Applications can be submitted online. The 2025 California Building Standards Code took effect January 1, 2026, and Concord identifies it along with Municipal Code Title 15 as its adopted standards.
Renovating an older home means two extra questions get answered before anyone swings a hammer. The EPA’s Renovation, Repair and Painting Rule generally applies when paid contractors disturb painted surfaces in homes built before 1978. The minor-repair exception generally covers no more than 6 square feet of disturbed interior paint per room (20 square feet on the exterior), and window replacement or demolition of painted components stays covered regardless of those thresholds. We’re an EPA Lead-Safe Certified Firm, so this is a planning conversation, not a surprise.
For Contra Costa County projects, the Bay Area Air District requires notification at least 10 business days before a qualifying asbestos renovation, meaning removal of at least 100 square feet, 100 linear feet, or 35 cubic feet of regulated material, and for every regulated structural demolition. A 72-hour notification option with an added fee may be available for residential buildings with four or fewer dwelling units. Suspect materials include older flooring, mastics, drywall compounds, insulation, and duct materials, and they may need testing before disturbance.
Not every project triggers every one of these. That’s the point of a professional review before any exploratory demolition. You can verify any contractor’s license status, including ours, at cslb.ca.gov.
Don’t Demolish Until the Project Is Ready: Pre-Demolition Checklist

When demolition starts before decisions are finished, the crew waits and the budget moves. Run this list first.
- Permit issued
- Final plans and elevations approved
- Appliances specified by model number
- Cabinet order verified against field measurements
- Every finish documented, not just discussed
- Long-lead items confirmed on order
- Plumbing and electrical plan complete
- Duct route and hood termination confirmed
- Lead and asbestos questions answered
- Temporary kitchen set up and working
- Furniture and walkways protected
- Plan in place for kids and pets
- Daily communication and site-access rules agreed
One tip that pays off later: pack by category and label each box with where those items will live in the new space. Unpacking becomes the last easy step instead of a second project.
How to Live Through a Kitchen Renovation Without Losing Your Mind
Kitchen projects commonly run anywhere from about three weeks to five months depending on scope. A firm written timeline with milestones is worth far more to you than any single number, because it tells you what should be happening and when. Ask for that schedule early, since the renovation process feels shorter when you can see it laid out.
Create a real temporary kitchen: a fridge you can reach, a microwave, a kettle or coffee station, a safe prep surface, a dishwashing plan with a drying rack, and paper goods. Plan a few weeks of simple cooking around what that setup can handle. Then manage the rest of the household. Plastic barriers and dust separation at the work zone. Medication and pet food kept easily accessible without entering the site. Worker parking and a designated entry. Quiet-hour expectations if someone works from home. A daily cleanup standard you agreed to in advance.
One honest note: our one-day remodel is a bathroom service. Kitchens don’t work that way, and we’d rather tell you that up front.
What to Inspect Before the Final Payment
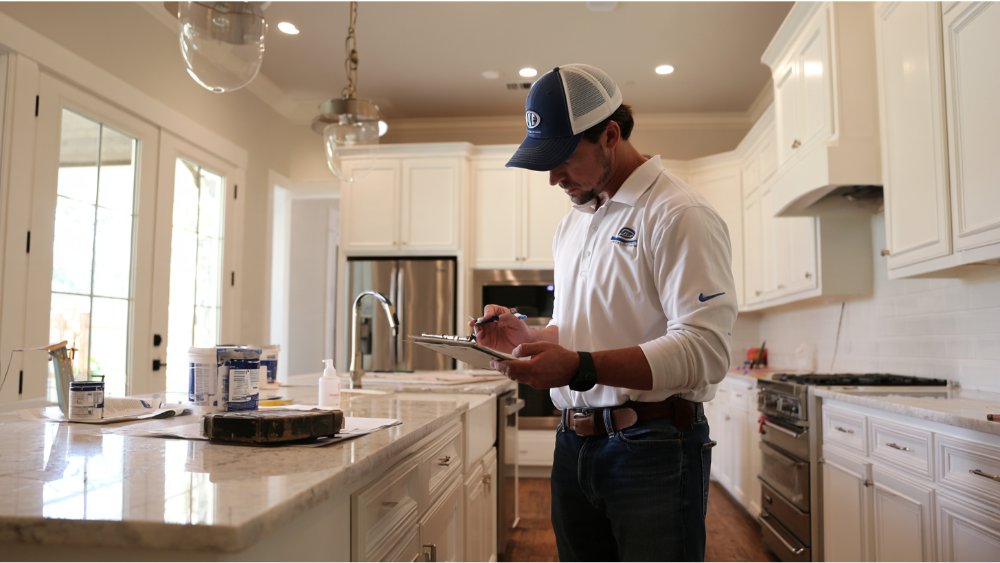
Walk the kitchen slowly with a notepad. Check that:
- Cabinet doors and drawers open, close, and align
- Appliance doors clear adjacent counters, handles, and each other
- Every appliance powers on and operates as intended, including the oven and the microwave
- Hot and cold water run correctly at every fixture
- No leaks at the sink, disposal, refrigerator line, or dishwasher
- Outlets, switches, and dimmers all work, including island power
- The range hood runs and exhausts outdoors
- Countertop seams, edges, and cutouts match the approved plan
- Tile, grout, caulk, paint, and flooring are complete
- Required inspections are signed off
- Manuals and warranty documents are in your hands
- Punch-list items are written down with who’s responsible and by when
On our projects, that closeout comes with a 24-month labor warranty on the remodel and a limited lifetime warranty on DreamLine Custom Cabinetry.
Frequently Asked Questions
What not to do in a kitchen remodel?
Don’t choose finishes before the layout, appliances, and ventilation are settled. Don’t start demolition with open decisions. Don’t approve changes verbally instead of through a signed change order. And don’t crowd your walkways to squeeze in a kitchen island the room can’t support.
What is the 30% rule in remodeling?
It’s a widely repeated rule of thumb, not a regulation: homeowners often hear that a renovation shouldn’t exceed roughly 30% of the home’s value, and that a 15% to 20% contingency belongs inside whatever number you set. Treat both as guidance. For a real figure on your kitchen, schedule a free estimate.
In what order should a kitchen remodel be done?
Planning runs goals, scope, budget, layout, appliances and ventilation, cabinets and storage, sink and countertops, lighting and electrical, then finishes. Construction runs demolition, rough-ins, inspections, drywall, flooring, cabinets, countertop template and installation, backsplash, fixtures, paint, then punch list.
What is the new kitchen trend for 2026?
The direction is warmer natural materials inside otherwise modern rooms, layered and controllable lighting, quieter ventilation that actually captures at the cooktop, deep-drawer storage with small appliances tucked out of sight, and durable nonporous surfaces. White cabinets paired with wood tones still read fresh, and a short run of open shelving can lighten a wall of uppers if you’re honest with yourself about dusting it. Follow how your household lives and keep the kitchen in conversation with the rest of the house.
Let’s Plan Your Dream Kitchen Together
A kitchen renovation should make family life easier, not turn you into a project manager chasing four different trades. We handle design, permitting, DreamLine cabinetry, in-house stone fabrication, material procurement, and installation under one roof, with one accountable team and a 24-month labor warranty on the work.
Schedule a Free Consultation and we’ll start with how you actually use the space, then create a plan around it. Or Visit Our Showroom, our 20,000-square-foot Grand Kitchen and Bath Showroom in North Highlands, the largest showroom of its kind in the region. If you can’t picture it yet, try our Kitchen Visualizer Tool first. Call (916) 701-9660 or reach us at dreamhomeworks.com.